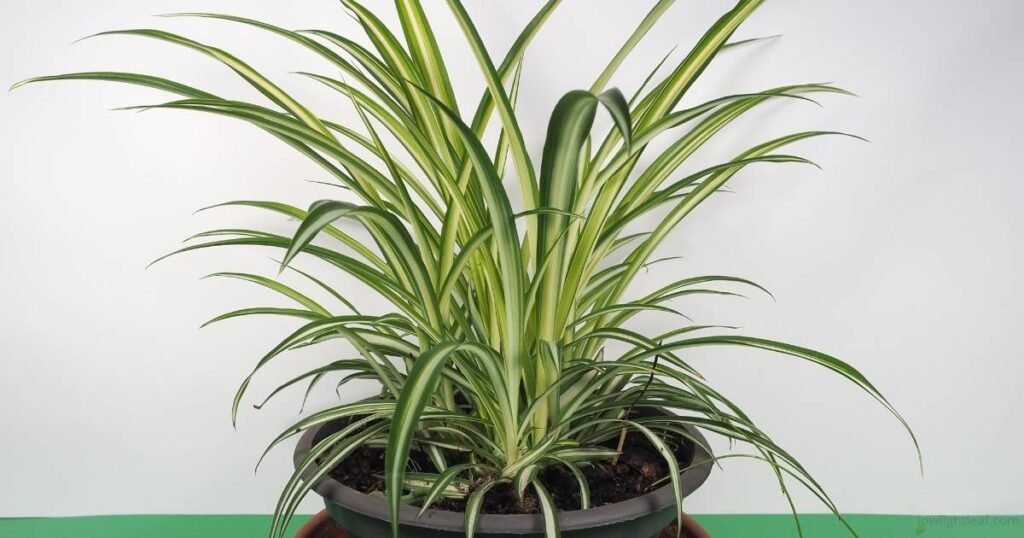
Spider plant brown tips affect almost every owner sooner or later, and they rarely mean your plant has a serious health problem. In most cases, your plant is perfectly healthy despite the cosmetic damage. You’re simply dealing with one of a few common care issues. The real work is figuring out which one applies to your situation, since the same brown tips can point to several different causes.
Quick answer: Spider plant brown tips are usually caused by tap water sensitivity (fluoride, chlorine, or minerals found in hard water), inconsistent watering, low humidity, or salt buildup from fertilizer. Most of these issues won’t threaten your spider plant’s long-term health if you correct them early. Existing brown tips won’t turn green again, but once you correct the underlying cause and trim the damaged tips, new growth should emerge healthy and free of browning.
What Do Brown Tips on a Spider Plant Mean?
The pattern on your leaves tells you more than any care checklist. Before you change your watering routine or buy a humidifier, look closely at where the browning appears and how it feels. That alone can quickly narrow down the cause.
Brown Tips Only (vs. Brown Edges)
If only the pointed tip of the leaf is brown while the rest remains healthy green, you’re likely seeing classic tip burn. This is the most common pattern and is usually linked to mild care issues such as poor water quality, low humidity, or inconsistent watering.
If the brown extends along the edges of the leaf instead, that’s a different pattern. Spider plant brown edges usually suggest the stress has progressed beyond simple tip burn.
Brown Spots or Browning at the Base
Brown spots on spider plant leaves are a separate issue from tip burn. Round or irregular spots usually point to fungal or bacterial leaf spot, sunburn, or early pest activity.
A yellow halo around the spot is more often linked to fertilizer or chemical burn.
Spider plant leaves turning brown at the base are a different warning sign, especially if the tissue feels soft instead of crispy. This usually points to root rot or a root-bound plant.
If your spider plant hasn’t been repotted in a couple of years, it may have quietly outgrown its container. It’s a worth checking situation before you change anything else about your care routine. You’ll find the same pattern covered in peace lily plant with brown leaf damage, where a cramped root system often shows up as browning near the base.
Brown Tips Paired with Yellow Leaves
If your spider plant has yellow and brown leaves together, especially yellowing that starts low and works upward, that usually points to overwatering or root stress rather than water quality. A similar yellowing pattern in peace lilies traces back to the same cause: water sitting around the roots too long. Check your soil moisture before doing anything else.
Crispy vs. Mushy, What Texture Tells You
Run your finger over the brown area:
Crispy, dry, and brittle with a clean line between dead and living tissue, your tip simply dried out faster than your roots could replace the moisture. Think water chemistry or humidity.
Soft, mushy, or dark near black — the tissue is rotting, not drying. Your next step should be checking the roots and soil, not adjusting humidity.
Quick diagnosis at a glance:
| What you’re seeing | Likely cause |
| Crispy tip only, rest of leaf green | Water quality, humidity, or mild underwatering |
| Brown and mushy, near the base | Root rot or a root-bound plant |
| Spots with a yellow halo | Fertilizer or chemical burn |
| Brown tips plus yellowing leaves | Overwatering |
| Browning right after repotting | Transplant stress (usually temporary) |
| Brown tips that keep returning despite good care | Buildup or a root-bound plant |
Why Are the Tips of My Spider Plant Turning Brown?
Once you’ve identified your symptom, here’s what’s causing it and what you should do next.
Low Humidity
What you’ll notice: Crispy, gradual browning at the tips, often worse in winter or near heating vents, while the rest of the leaf stays green.
Why it happens: Your spider plant prefers humidity between 40% and 60%, and most homes sit closer to 30% with heating or AC running. Dry air pulls moisture from the leaf faster than the roots can resupply it, so the plant sacrifices the tip to protect the rest.
What to do: Group a few plants together, add a pebble tray under your pot, or run a small humidifier nearby. If you’re looking for plants that work well grouped together indoors, these hanging indoor plants pair nicely with spider plants for shared humidity.
Common mistake: Many owners mist daily to fix humidity, but misting only wets the surface for a few minutes. Your plant needs a steady ambient humidity source, not a quick spray.
Poor Water Quality — Fluoride, Chlorine & Hard Water
What you’ll notice: Steady tip browning across multiple leaves. Reddish-brown tips generally point to fluoride; grayish-brown leans toward boron.
Why it happens: Tap water often contains fluoride, harmless to people but toxic to spider plants with repeated exposure. It accumulates in leaf tissue and damages the tip first, since that’s the point farthest from the roots. Chlorine evaporates if your water sits uncovered overnight, but fluoride doesn’t.
What to do: Switch to distilled water or use rainwater if you can collect it. Letting tap water sit overnight is a partial fix for chlorine only.
Salt and Fertilizer Buildup
What you’ll notice: Brown leaf tips that look like underwatering even when your watering routine is consistent. A white, crusty residue on the soil surface or pot rim is a strong indicator.
Why it happens: Spider plants are light feeders, and overfeeding is easy to do. Excess fertilizer leaves mineral salts in the soil that eventually pull moisture out of the roots rather than letting your plant absorb it.
What to do: Flush your soil every few months by watering slowly and thoroughly until runoff drains from the bottom, then repeat once more. Use diluted fertilizer only during the growing season, and skip it entirely in fall and winter.
Improper Watering
Both overwatering and underwatering produce spider plant brown leaf tips, which is why this cause confuses so many owners.
Signs of overwatering: Yellowing leaves near the soil line, mushy or foul-smelling roots, soil that stays wet for over a week. Your roots are losing oxygen and beginning to rot, which ironically prevents water absorption even though the pot is full.
Signs of underwatering: Dry, curling leaves and limp foliage that doesn’t recover between waterings. Your soil has dried out completely and stayed that way too long.
What to do: Stop watering on a calendar. Insert your finger two inches into the soil before every watering, if it still feels cool or damp, wait another day or two. The same soil moisture approach works for snake plants and most other houseplants that are sensitive to overwatering.
Too Much Direct Sunlight
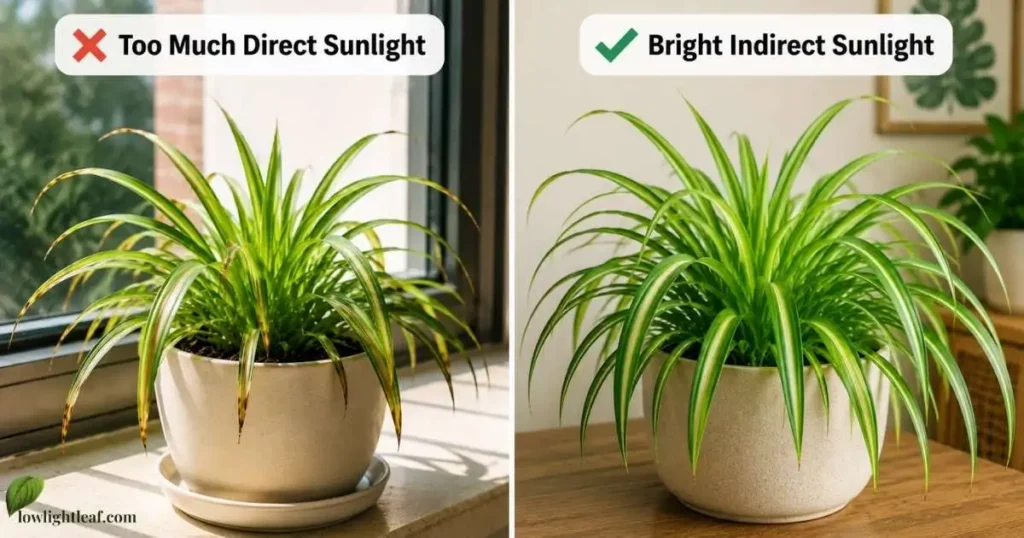
What you’ll notice: Browning with a bleached or faded appearance alongside it helps distinguish sunburn from chemical damage, which tends to look more uniformly brown.
Why it happens: Your spider plant naturally grows under a forest canopy with filtered light. A few hours of harsh afternoon sun through an unshaded south- or west-facing window is enough to scorch the leaf tissue.
What to do: Move your plant a few feet back from the window, or add a sheer curtain to filter the intensity.
Root Rot
What you’ll notice: Mushy texture near the base of leaves, yellowing lower leaves, and sometimes a sour smell from the pot. Visible symptoms often appear after the internal damage has already progressed.
What to do: Remove your plant from its pot, trim away soft or blackened roots with sterilized scissors, and repot into fresh, well-draining soil. Root rot is also covered among the common problems and downsides of keeping a spider plant if you want to understand the full picture.
Root-Bound Plant
What you’ll notice: Roots circling tightly inside the pot or pushing out of the drainage holes, and browning that continues despite consistent watering.
Why it happens: Spider plants produce thick, tuberous roots that fill containers quickly. Once they do, your plant can’t absorb enough water even with a perfect routine because there’s simply not enough soil left to hold moisture.
What to do: If you’ve ruled out pests and your watering is consistent, check your pot. Sizing up by one pot size is usually enough.
Transplant Stress After Repotting
Good news: Spider plant brown tips after repotting are usually a normal, temporary reaction, not a sign something went wrong. Disturbing the roots briefly interrupts water uptake while your plant adjusts. You’ll typically see mild browning on a few leaves for the first week or two. If you’re ready to give your plant more room, dividing and propagating spider plants during a repot is straightforward and worth doing at the same time.
Natural Aging
Not every brown tip signals a problem. As spider plants mature, the older leaves near the base gradually thin out as part of their natural growth cycle. This is actually one of the benefits of a well-established spider plant, it continuously channels energy into new growth. If only your oldest, lowest leaves are browning while new growth stays vibrant, no action is needed.
Why Do Brown Tips Keep Coming Back Even After You Fix the Problem?
If you’ve already adjusted your plant care but brown tips keep coming back, one of these three issues is usually the reason.
Check for leftover salt buildup first. Months of tap water and fertilizer may have already left mineral salts behind. Even if you’ve switched to cleaner water, the buildup stays until you flush the soil.
Check whether your plant has become root-bound. It’s easy to focus on watering and humidity while the real problem is simply a lack of root space.
Check your watering method. If you’re still going by a fixed schedule, you’re occasionally watering too early or too late. Switch to checking the soil before watering, then monitor your plant for two to four weeks before looking for another cause.
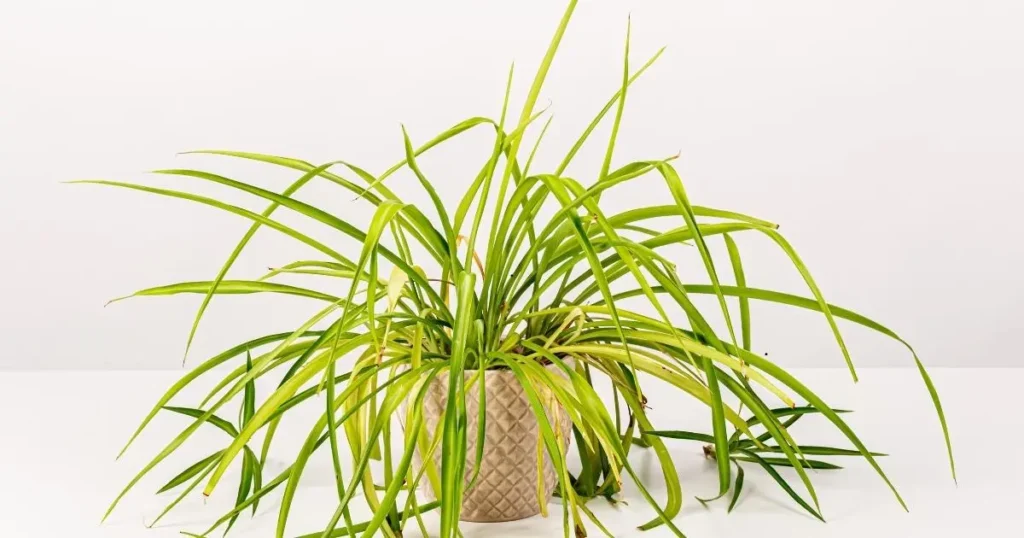
Why Are My Spider Plant Leaves Turning Fully Brown, Drooping, or Falling Off?
Spider plant leaves turning brown and falling off is a more advanced stage than tip burn and usually suggests that one of the problems above has gone unresolved.
If entire leaves begin yellowing, then turn brown while the soil stays soggy and smells musty, the problem has likely progressed beyond simple overwatering. Leaves that become completely limp, dry, and brown, especially the oldest ones, usually indicate repeated periods of severe underwatering.
In advanced cases, root rot can cause entire leaves to collapse and fall off, a progression you might also notice with snake plant leaves that yellow and decline when root stress goes uncorrected for too long.
When you don’t need to worry: A leaf or two yellowing at the base of a healthy, actively growing spider plant is usually part of its natural aging process, especially if the new growth remains healthy.
How to Fix Spider Plant Brown Tips
Now that you’ve identified the most likely cause, use the matching fix below instead of trying multiple solutions at once.
Adjust Your Watering Routine
Stop watering on a calendar and start checking your soil. If the top two inches still feel cool or damp, wait before watering again. Your spider plant’s actual needs shift with the season, your home’s humidity, and light conditions. No schedule can account for all of that.
Switch to Better Water
Distilled water contains no fluoride and is the most reliable option for preventing chemical-related browning. Rainwater works nearly as well. If you’re using tap water, letting it sit uncovered overnight helps reduce chlorine, but not fluoride, so treat it as only a partial solution.
Flush Salt and Mineral Buildup
Every few months, water your plant slowly and thoroughly until you see runoff from the bottom, then repeat the process once. This pushes accumulated salts out of the root zone instead of letting them concentrate with every regular watering.
Increase Humidity Without Buying Gadgets
A shallow pebble tray under the pot raises humidity gently as water evaporates. Grouping a few plants together creates a shared humidity pocket through natural transpiration. Misting feels productive, but it only wets the leaf surface for a few minutes. It won’t meaningfully raise the ambient humidity around your plant.
Move to Bright, Indirect Light
A north- or east-facing window gives your spider plant plenty of brightness without direct, scorching rays. If your only bright window faces south or west, a sheer curtain filters the intensity without sacrificing the light your plant needs.
Treat Root Rot or a Root-Bound Plant
For root rot, remove your plant from its pot, trim away soft or blackened roots with sterilized scissors, and repot into fresh, well-draining soil. For a root-bound plant, check whether roots are circling tightly or pushing out of the drainage holes. Sizing up by one pot size is usually enough.
Fertilize Correctly
Your spider plant needs surprisingly little feeding. A diluted, balanced fertilizer once a month during spring and summer is plenty. Skip it entirely during fall and winter. This simple change prevents much of the salt buildup that causes browning.
How to Revive a Spider Plant With Severe Brown Tips
If your plant has multiple issues stacked together, some growers use a diluted hydrogen peroxide solution before repotting to help clean damaged roots. This may help oxygenate and clean damaged roots. It’s not a routine step, but it can be useful for severely stressed plants.
Once the cause is corrected, expect new growth within two to four weeks. If it’s still browning after a month, one of the underlying causes likely hasn’t been fully resolved, go back and check each one.
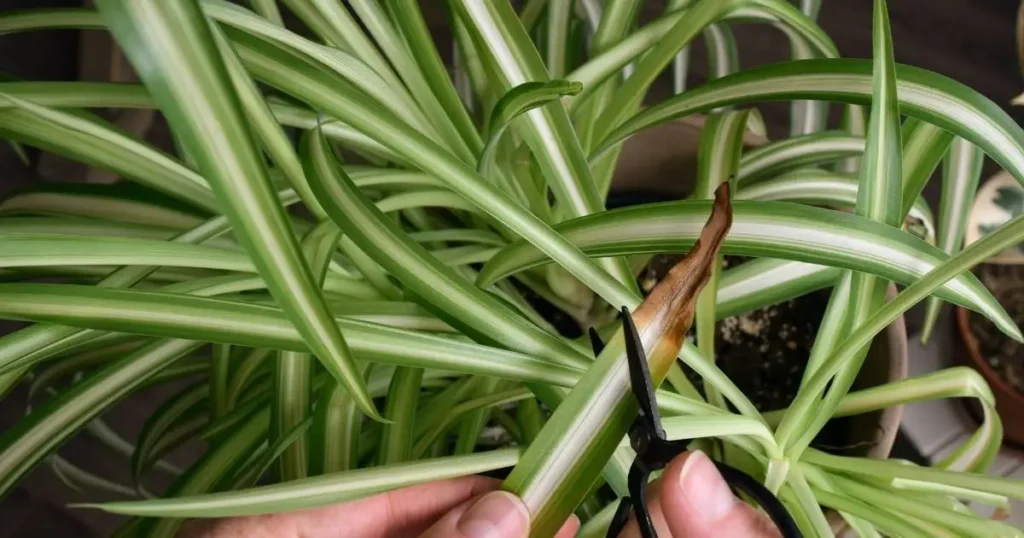
Should You Cut Off Brown Tips on a Spider Plant?
Yes, and you should feel confident doing it. Trimming brown tips is safe and improves your plant’s appearance, even though it doesn’t solve the underlying problem. It improves your plant’s appearance immediately and encourages a cleaner-looking plant while healthy new growth continues to develop.
Important: Dead leaf tissue won’t turn green again. The goal is to prevent future browning by correcting the underlying issue.
How to trim spider plant brown tips without causing more browning:
- Use clean, sharp scissors wiped with rubbing alcohol between cuts.
- Cut at a slight angle following the leaf’s natural pointed shape.
- Leave a tiny sliver of brown at the edge of your cut.
- Cutting directly into healthy green tissue often triggers a fresh brown edge as the leaf reacts.
- Avoid removing more than about 20% of the foliage in one sitting.
How to Prevent Spider Plant Brown Tips
Preventing spider plant brown tips is much easier than fixing them later:
- Water by soil moisture, not by a fixed schedule.
- Choose distilled, filtered, or rainwater whenever possible.
- Maintain 40–60% humidity — a cheap hygrometer removes the guesswork entirely.
- Feed lightly, and only in the growing season, to prevent salt buildup later.
- Keep your plant a few feet from unfiltered direct sun, or filter it with a sheer curtain.
- Use well-draining soil with perlite and a pot with drainage holes to avoid the soggy conditions that lead to root rot.
For everything else your spider plant needs to stay healthy long term, the complete spider plant care guide covers watering, light, soil, feeding, and more in one place.
Frequently Asked Questions
Can brown tips on a spider plant turn green again?
No. Once a leaf tip has turned brown, that tissue is dead and won’t regain its green color. Correcting the underlying problem prevents new tips from browning, and healthy new leaves will gradually replace older damaged ones.
Should I remove brown leaves or just trim the tips?
If only the tips are brown, trim the damaged ends while keeping the healthy part of the leaf intact. Remove the entire leaf only if it’s mostly brown, badly damaged, or naturally dying back near the base of the plant.
Can hard water cause brown tips on spider plants?
Yes. Hard water often contains dissolved minerals that gradually build up in the soil and may contribute to brown leaf tips over time. Switching to distilled, filtered, or rainwater can help prevent further browning.
How do I know if it’s pests or something else?
Inspect the leaves, stems, and undersides of the foliage for webbing, sticky residue, tiny insects, or visible feeding damage. If you don’t find these signs, brown tips are much more likely to be caused by watering, humidity, water quality, or fertilizer buildup.
Why do only the tips turn brown while the rest of the leaf stays green?
The leaf tips are the last part of the leaf to receive water, making them the first area to show stress from dry air, inconsistent watering, mineral buildup, or poor water quality. That’s why the rest of the leaf often stays healthy.
Final Thoughts
Spider plant brown tips may look frustrating, but they’re usually a sign that your plant needs a small care adjustment, not that it’s beyond saving. Instead of trying multiple fixes at once, identify the most likely cause, make one meaningful change, and give your plant time to respond.
Healthy new growth is the best indicator that you’re back on the right track. With consistent care and the right growing conditions, your spider plant can continue producing lush, vibrant foliage for years to come.
Explore more:
Muddsir Munir
Houseplant enthusiast researching and writing about indoor plants, helping beginners grow spider plants, snake plants, and more with confidence.