Snake plants are easy to live with, which is why so many people keep them at home. They stand tall, don’t need frequent watering, and usually keep growing even if care isn’t perfect. That said, they do outgrow their pots over time. As the plant grows, roots take up more space, and new shoots may appear. Snake plants can stay root-bound for some time, but leaving them that way too long can slow growth and cause problems. This is where repotting a snake plant at the right time really helps.
If you’re new to growing this plant, our detailed snake plant care guide explains light, watering, and basic care essentials before repotting. If you don’t know when or how to repot, or what soil to use, follow these simple steps to keep your snake plant healthy and growing.
When Do Snake Plants Need Repotting?
The best time to repot a snake plant is when it’s actively growing, which becomes easier to judge once you understand how snake plants grow indoors. For most homes, that’s spring or early summer, when new leaves appear, and the plant recovers faster after repotting.
Snake plants are pretty forgiving. They can stay root-bound for a while, so repotting isn’t urgent unless the pot feels tight or growth slows down. Most healthy plants need repotting after a few years(3 to 4 years), depending on light and growth rate.
If your snake plant is cracking its pot, producing crowded growth, or slowing down noticeably, it’s a good sign that repotting shouldn’t wait; even if it’s outside the ideal season. Take action now and repot your snake plant to keep it thriving! Don’t wait; gather your supplies and start repotting today for a healthier plant.
Signs Your Snake Plant Needs Repotting
Snake plants clearly show when they’ve outgrown their pots. Catching these signs early helps prevent stress, poor growth, and root damage. If you notice any of the following signs, it is time to repot your Snake plant.
Roots Growing Out of the Drainage Holes: Roots emerging from drainage holes mean the snake plant lacks space. The roots are packed tight, so repotting into a slightly larger pot is needed.
Water Drains Out Immediately: If water drains out instantly, the soil is likely old and depleted. Roots may now fill most of the pot, leaving little space for moisture and nutrients.
Pot Is Cracking or Bulging: Snake plant roots are strong and aggressive. When confined:
- Plastic pots may split or crack.
- Clay or ceramic pots may bulge or break when roots push outward.
This is a clear sign that the roots are escaping the pot, so repotting is necessary.
Plant Completely Fills the Pot: If foliage is crowded against the pot’s edge, roots are cramped too. Dense leaves mean the plant needs a bigger pot.
Plant Falls Over Repeatedly: If your snake plant won’t stay upright, its roots are likely cramped. Repotting gives it better support and balance.
Little or No New Growth: At the time of year when snake plants normally put out new growth, a healthy snake plant should produce new leaves and noticeable height growth. If growth has slowed or stopped despite proper care, limited root space may be the cause.
Yellowing, Wilting, or Drooping Leaves: Overcrowded snake plants often show stress: yellowing, wilting, drooping, or browning leaves. Water issues cause similar symptoms, but root congestion is another common reason.
Soil Stays Wet and Smells Bad: If the soil remains overly wet and a foul smell comes from the root ball, this may indicate root rot. Old, compacted soil does not drain properly and should be replaced during repotting.
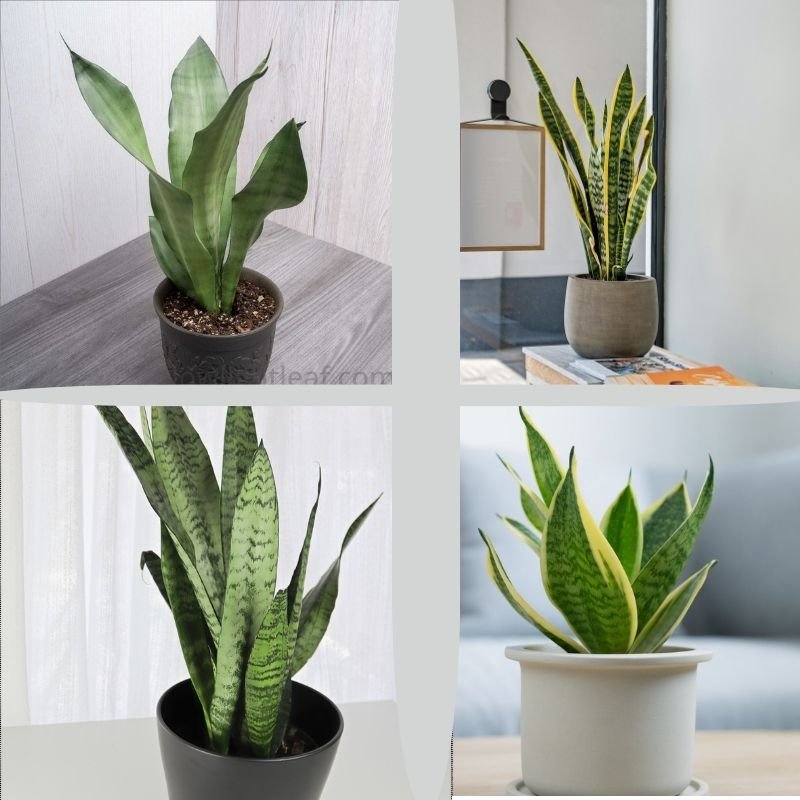
New Pups appearing at the Base: The appearance of several new pups around the base of the plant is a natural sign of maturity,especially among different snake plant varieties. Repotting at this stage allows you to separate the pups and propagate them successfully.
How Often Should You Repot a Snake Plant?
Snake plants are slow growers, so repotting a snake plant every two to three years is usually enough to maintain healthy growth, similar to the slow growth pattern explained in ZZ plant care. Frequent repotting is not necessary.
If the plant becomes large or crowded, repotting sansevieria can also involve dividing it into smaller sections rather than using a much bigger pot. This helps manage root space and allows easy propagation.
Best Soil for Repotting Snake Plant

Snake plants are drought-tolerant and grow best in a well-draining snake plant potting soil, which is essential for many low-light indoor plants to prevent root rot. When repotting a snake plant, using the right soil is important because compact or moisture-retaining mixes can quickly lead to root rot.
The best soil for a snake plant should
➦Drain fast
➦Stay light and airy
➦Hold only minimal moisture
A suitable mix supports healthy roots, prevents overwatering issues, and helps repotting sansevieria succeed indoors.
Ideal Snake Plant Potting Soil
The ideal snake plant potting soil should be light and fast-draining. Since snake plants act like succulents, a mix with perlite, sand, and coco coir works well. You can also mix equal parts cactus potting mix for snake plant and regular potting soil for good drainage and root health.
Does Cactus Mix Work for Snake Plants?
Yes, cactus mix for snake plant works very well because it drains quickly and doesn’t hold excess moisture, which is important for plants grown in low-light areas indoors. In fact, cactus potting mix for snake plants helps prevent root rot, a common problem in heavy soil.
Recommended Soil Mix for Snake Plants
For repotting a snake plant, I use a mix that drains fast but still supports healthy growth.
➦2/3 indoor potting soil
➦1/3 succulent or cactus mix for snake plant to improve drainage
➦A small handful of organic compost or worm compost for gentle nutrients
If compost isn’t available, you can also improve drainage by adding perlite, pumice, or clay pebbles to the mix. These keep the soil airy, prevent excess moisture, and reduce the risk of root rot.
Choosing the Right Pot for Repotting Snake Plant
When you repot your snake plant, make sure to select an appropriate pot. Your plant will thrive if you keep it slightly root-bound, so avoid using a container that’s much too large, as it can trap excess moisture and promote root rot.
As you repot your sansevieria, ensure the new pot provides just enough space for its roots. I’ve found that using the right pot size and proper drainage makes a big difference in how quickly a snake plant adjusts after repotting.
Best Pot Size & Drainage
Choose the Right Pot Size: For best results, increase your pot size gradually when repotting your snake plant. Typically, move your plant to a pot that is 1 to 2 inches wider than its current one. For instance, if your snake plant lives in a 6-inch pot, upgrade to an 8-inch pot for a gentle transition.
Avoid Very Deep Pots: Even though your snake plant likes to spread outward, it doesn’t need a very deep pot, unlike many hanging indoor plants that benefit from deeper containers. Deep containers hold excess soil at the bottom, which can trap moisture and enhance the risk of root rot. Instead, choose a slightly wider, shallow pot for your plant.
Always Use Pots with Drainage Holes: Always select a pot with drainage holes, so excess water can easily escape. You might use a plastic pot, but unglazed clay or terracotta pots will be especially useful because they allow better air and moisture exchange and help stabilize taller, top-heavy plants.
How Deep to Plant a Snake Plant When Repotting
When repotting a snake plant, place it at the same soil depth it was growing before. The base of the plant should sit just above the soil surface, not buried too deep.
Planting too deeply can trap moisture around the stem, increasing the risk of rot, a problem also highlighted by the Royal Horticultural Society (RHS) in its snake plant growing guidance. After positioning the plant, gently fill in the soil around the roots and press lightly to keep it upright.
Repotting a Snake Plant: Essentials
Before you start repotting your snake plant, gather your supplies. Being prepared will help ensure a smooth, damage-free experience for both you and your plant.
You’ll need:
➦Gardening gloves to protect your hands
➦A clay or ceramic container that’s slightly larger than the existing pot (about 2 inches wider)
➦Room-temperature, chemical-free water
➦Sterilized scissors or pruning shears for trimming roots
➦Cactus potting mix for snake plant (or regular potting soil mixed with perlite and sand)
➦A plastic sheet or old newspaper to keep your workspace clean
Once you have these supplies ready, you’ll find repotting sansevieria quick, safe, and stress-free, for both you and your plant. Ready to get started?
How to Repot a Snake Plant (Step-by-Step)
If the answer to when to repot a snake plant is “now,” there’s no need to stress. Repotting a snake plant is simple, even for beginners, and this low-maintenance plant handles the process very well. Follow these steps to ensure a smooth transition and healthy root growth.
Step 1: Prepare the Pot & Soil
Before you begin, gather everything you need. Choose a new pot that is 1 to 2 inches wider than the current one and make sure it has drainage holes. Prepare a well-draining snake plant potting soil, such as a succulent or cactus mix. Lying down a newspaper or a plastic sheet helps keep your workspace clean and makes the process easier.
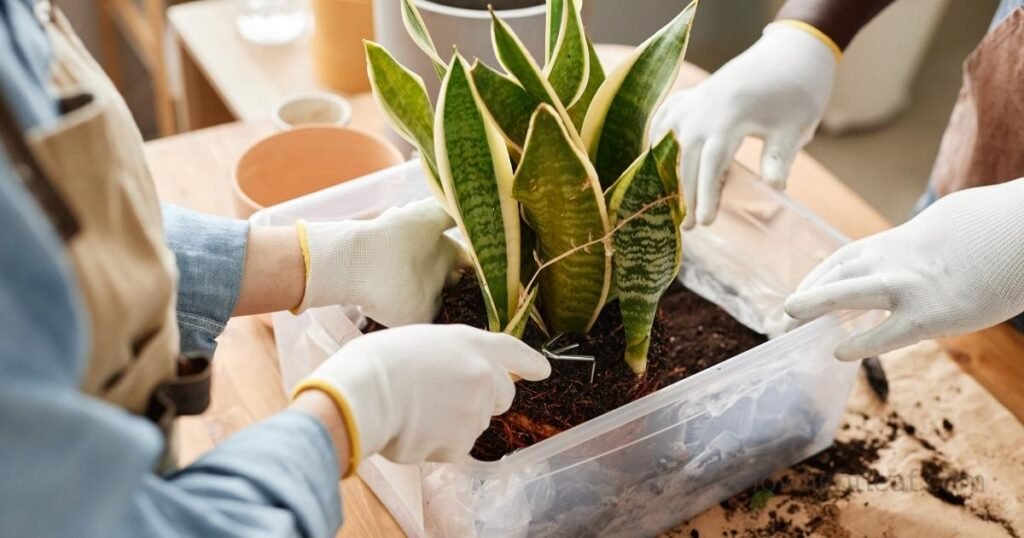
Step 2: Remove the Plant Safely
Next, gently remove the snake plant from its old pot. Hold the plant at the base, not by the leaves, and ease it out slowly. If the plant is root-bound and won’t budge, lightly press the sides of the pot or run a dull knife around the inside edge to loosen the soil. Avoid pulling on the foliage, as snake plant leaves can snap if handled roughly.
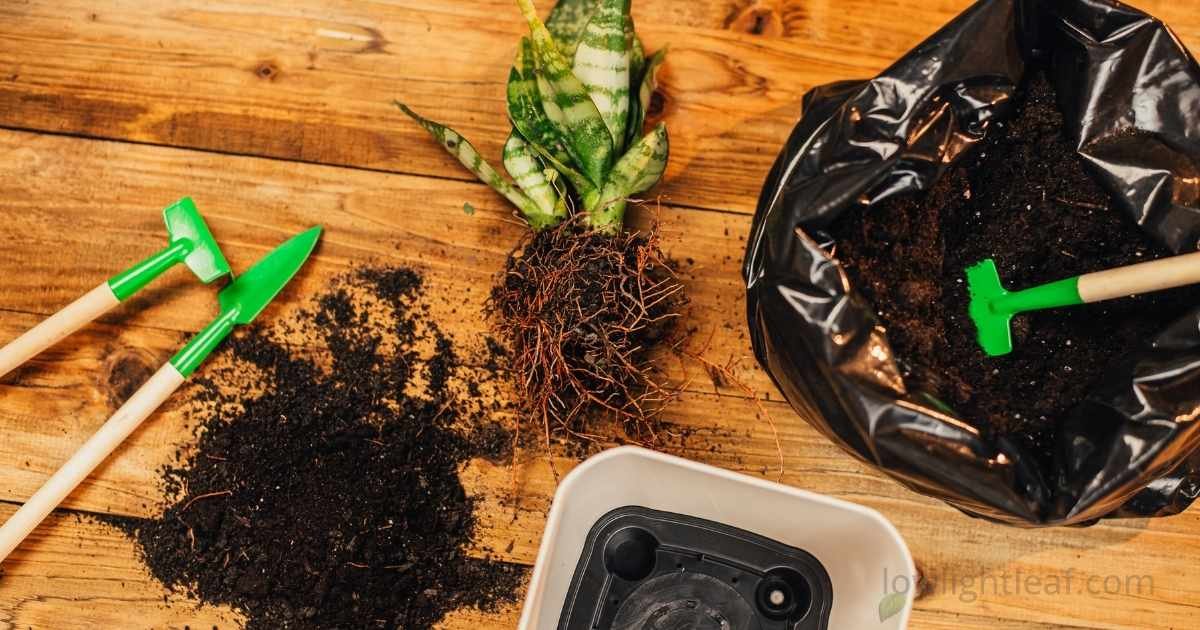
Step 3: Inspect & Trim Roots
Once the plant is out, gently shake or brush away excess soil to expose the roots. Look for roots that are firm and light-colored, indicating health. Examine for any signs of discoloration, mushiness, or odor, which may signal damage or rot.
Trim away any soft, mushy, or damaged roots using clean scissors or pruning shears. This is also a good time to separate any pups if you plan to propagate sansevieria during repotting.
Step 4: Position at Correct Depth
Add a layer of fresh soil to the bottom of the new pot. Place the snake plant on top and adjust until it sits at the same depth as before. The base of the plant should remain just above the soil surface.
Planting too deeply can trap moisture around the stem and increase the risk of rot, so take a moment to get the depth right before moving on.
Step 5: Fill Soil & Stabilize
Once positioned, fill in around the sides with your soil mix. Gently press the soil to remove air pockets while keeping the plant upright. Leave about 1 inch of space between the soil surface and the pot rim to allow for easy watering. At this stage, the plant should feel stable but not tightly packed.
Step 6: When to Water After Repotting
If the soil is completely dry, you can water lightly to help settle it around the roots. If the soil is already slightly moist, wait a few days before watering.
Snake plants prefer drier conditions, and overwatering right after repotting is one of the most common mistakes to avoid.
Step 7: Post-Repotting Placement
Finally, move your repotted snake plant to a spot with bright, indirect light. Avoid direct sun for the first few days, as the plant needs time to adjust. Resume normal care once the plant settles. Growth may pause briefly but usually resumes quickly.
Care for a Snake Plant After Repotting
After repotting, give your snake plant time to adjust and thrive in its new home. Since snake plants prefer dry conditions, wait 5–7 days before watering. This helps the roots settle and reduces the risk of rot, setting your plant up for success.
From here, water only when the soil feels dry about two inches deep, following a proper snake plant watering schedule to avoid overwatering. You’re doing an excellent job; your plant thrives with just a little more water in spring and summer, and less in winter. Trust yourself; you’re providing wonderful care!
Place the plant in a spot with bright, indirect sunlight, such as near a window filtered by a sheer curtain. Always place it out of direct sunlight, as it can scorch the leaves. Bright, indirect light ensures healthy growth and helps your snake plant recover well after repotting.
Repotting Snake Plant: Common Issues and Simple Fixes
Although snake plants are hardy, a few temporary problems can appear after repotting a snake plant. Most of these issues are normal and easy to fix once you understand the cause.
Snake Plant Drooping After Repotting
Drooping is often caused by transplant shock, excess moisture, or using a pot that is too large. Let the soil dry out fully and make sure the pot size is only slightly bigger than the original.
Snake Plant Turning Yellow After Repotting
Yellow leaves generally indicate poor drainage, root damage, or overwatering. Ensure a well-draining soil mix and avoid overwatering. Remove severely damaged leaves to support recovery.
No New Growth After Repotting
It’s common for snake plants to pause growth after repotting. This adjustment period is normal. Place the plant in bright, indirect light and allow time for the roots to settle.
Soft or Mushy Leaves
Soft leaves usually signal too much moisture. Inspect the soil and let it dry fully before watering again.
Plant Leaning or Falling Over
If the plant is unstable, the soil may be too loose. Press the soil firmly around the base and keep the plant at its previous depth.
Root Rot After Repotting
Root rot may develop if the soil retains excess water or the pot lacks drainage. Trim affected roots and repot in fresh, fast-draining soil.
FAQs About Repotting Snake Plant
Do snake plants need deep pots?
No, snake plants do not need deep pots. They grow best in slightly shallow pots, as deep containers trap excess moisture, increasing the risk of root rot.
Do snake plants like to be crowded?
Yes, snake plants prefer to stay slightly rootbound, meaning their roots fill the pot with little extra space. They thrive in these snug conditions, but once roots fill the space or start pushing out, you need to repot them.
What type of soil does a snake plant need?
Snake plants need a well-draining soil mix. The best option is snake plant potting soil made with cactus mix, perlite, sand, or coco coir to prevent excess moisture.
Why is my snake plant dying after repotting?
A snake plant may struggle after repotting due to overwatering, poor drainage, root damage, or shock. Allow the soil to dry, water sparingly, and keep it in bright, indirect light.