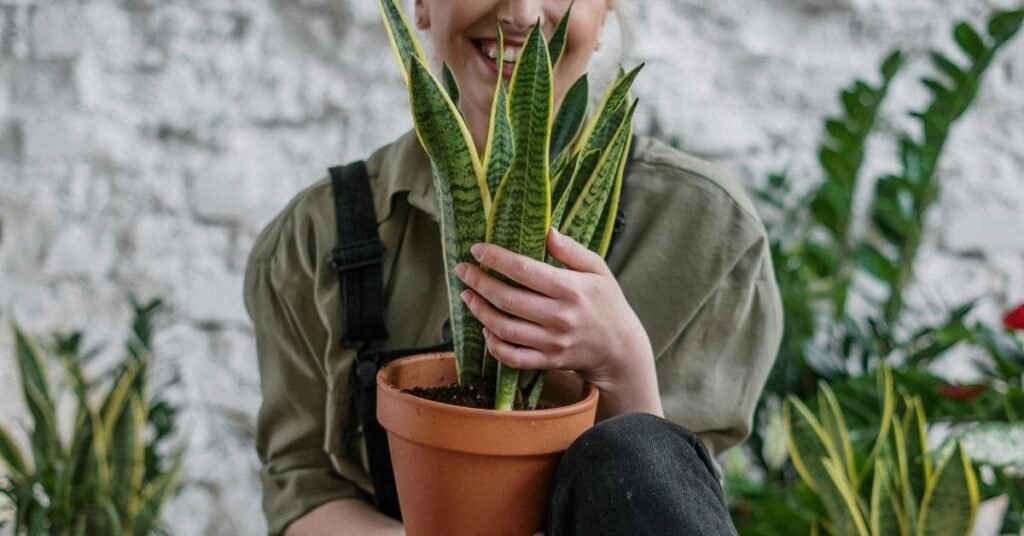
If you’re wondering about snake plant propagation, you’re not alone. I’ve found that snake plants are incredibly forgiving, but propagation still requires understanding how they grow and spread. Once you know what’s happening beneath the soil, the entire process becomes far more predictable and successful. If you want the fastest and safest method, jump straight to the division method below.
What is Snake Plant Propagation
Before jumping into different methods of snake plant propagation, it helps to understand how these plants naturally reproduce. In my experience, many propagation failures happen simply because people rush the process without knowing how snake plants actually grow.
How snake plants naturally multiply
Snake plants grow slowly, producing new shoots over time rather than all at once, and different snake plant varieties may show slight differences in growth patterns. As they mature, they spread outward through underground connections, forming clusters of upright leaves.Because of this natural growth pattern, propagating snake plant cuttings takes patience, often requiring several weeks to root.
Role of rhizomes in new growth
Snake plant propagation depends heavily on rhizomes, which are thick underground stems that store energy and produce new shoots. When a plant is divided, each healthy rhizome already contains growth nodes capable of developing into a separate plant. When you know what’s happening beneath the soil, you’re less likely to overwater and more likely to see successful growth.
Reasons for Propagating Snake Plants
Leaf instability: As snake plants grow taller, heavy leaves may bend or pinch at the base, making leaf cuttings a simple way to restore balance.
Overcrowding: When too many shoots grow close together, splitting the plant gives each one more room and helps it grow better.
Plant renewal: Propagation is an easy way to refresh an aging plant and enjoy a few new ones at the same time.
Best time for snake plant propagation
The best time to propagate a snake plant is during its active growing season, typically in spring and summer. During these months, roots and new shoots develop faster, making propagation more successful.
That said, in milder climates, early fall can also work. In my experience, propagation during winter isn’t ideal, but it’s still possible, expect slower growth, similar to what you’ll notice with other hardy houseplants covered in our ZZ plant care guide and be extra careful with watering.
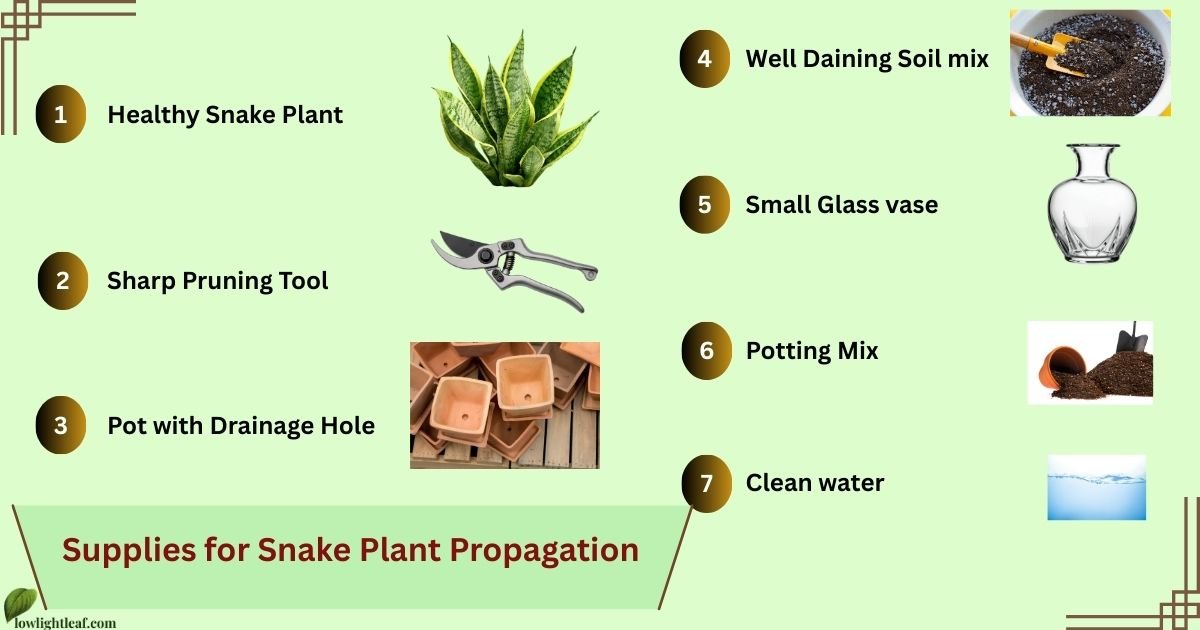
Snake Plant Propagation: Essentials
Before you start propagating your snake plant, whether in soil or water, having the right supplies ready and following a proper snake plant care guide makes the whole process smoother and more successful.
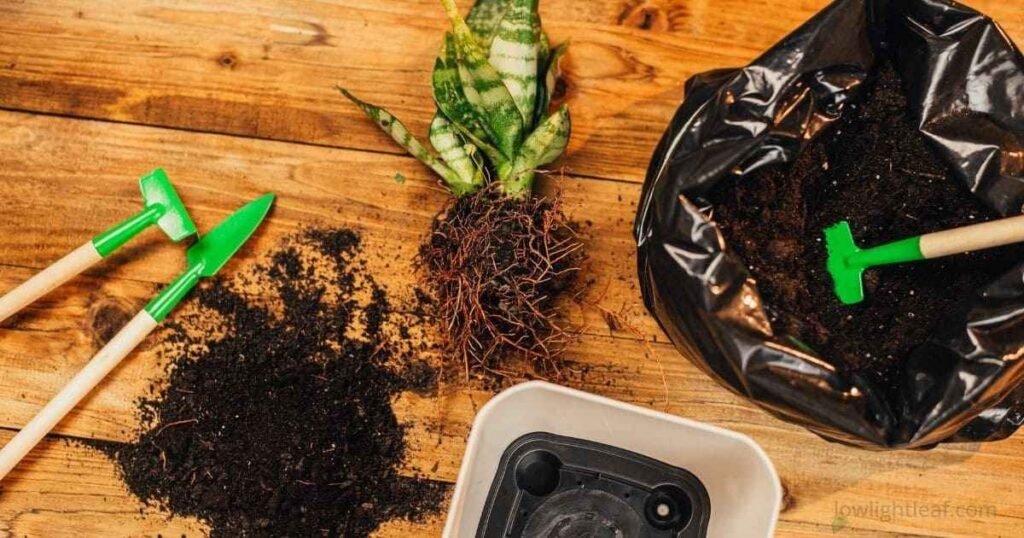
Snake plant propagation doesn’t require fancy tools; just the right basics. A healthy plant, clean cutting tools, proper drainage, and a well-draining soil mix set the foundation for successful rooting.
With just these basic materials, you’re fully prepared to propagate your snake plant successfully, no complicated tools or expensive supplies required.
Essential Setup for Propagation
Well-draining soil mix: Use a light, airy growing medium to prevent excess moisture; succulent or cactus potting soil.
Proper pot with drainage: Choose a small pot with drainage holes
Healthy leaf cuttings: Take snake plant leaf cuttings from a disease-free plant
sharp, sterilized tool: use a sharp, sterilized pruning tool.
Callusing before planting: Let the cut ends dry and heal for a few days to reduce the risk of rot and improve rooting success.
This setup supports both propagating snake plants in soil and in water, with consistent results, especially for common low light plants grown indoors.This setup supports both propagating snake plants in soil and in water, with consistent results.
Propagating Snake Plant by Division (Rhizome Method)
Propagating a snake plant by division (rhizome method) is hands down the most reliable and fastest way to propagate a snake plant. Unlike leaf cuttings, you’re not starting from scratch. This sansevieria propagation method works especially well when your snake plant becomes root-bound or produces multiple clumps over time.
Removing the Plant from Its Pot
➦ To begin propagating the snake plant by division, prepare your workspace. If you’re working indoors, spread a tarp or an old sheet to avoid a mess from soil. Otherwise, doing this step outdoors makes cleanup easier.
➦ Lay the snake plant gently on its side and slide the pot off. If the plant feels stuck, lightly squeeze or tap the sides of the pot to loosen the root ball. For tightly packed or root-bound snake plants, take your time; forcing them can damage healthy roots and slow propagation.
➦ Once removed, gently shake off excess soil to clearly see the roots and rhizomes.
Separating Rhizomes and Clumps
This is the most important step for successfully propagating snake plants.
➦ Look closely at the base of the plant and identify natural clumps, groups of leaves already growing from their own rhizomes.
➦ Using your hands, carefully pull the clump away from the mother plant while untangling the roots. In many cases, the roots will separate easily without tools. If the roots are tightly bound, use sharp, clean pruning shears or a knife to make a precise cut through the rhizome.
Try to:
- Keep as many healthy snake plant roots attached as possible.
- Avoid cutting leaves unnecessarily.
- Make clean cuts only where needed.
Each division should have at least one healthy rhizome, roots, and a few leaves to ensure successful propagation of the snake plant without setbacks.
Replanting Divisions Successfully
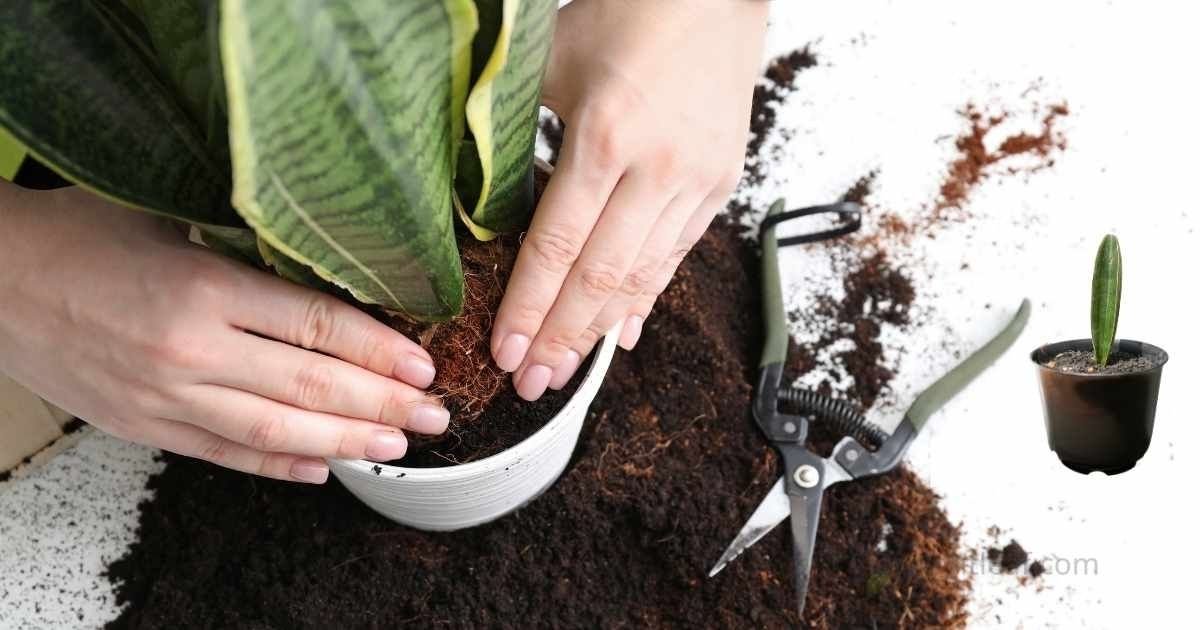
➦ Once divided, it’s time to replant your propagated snake plant divisions, a process very similar to snake plant repotting. Choose a pot with proper drainage holes and fill it with a well-draining soil mix, such as a sandy or succulent-based medium. Snake plants dislike soggy soil, so drainage is essential for long-term health.
➦ Place each division into its new pot at the same depth it was growing before. Gently firm the soil around the roots to provide stability, but don’t compact it too tightly.
After planting:
- Water lightly to settle the soil.
- Place the pot in bright, indirect light, following proper snake plant light requirements for healthy growth.
- Avoid heavy watering for the first 7–10 days.
Once the plant adjusts, resume a normal watering routine. With proper care, snake plant propagation by division often shows new growth within a few weeks, making this method ideal for fast, low-risk, and stress-free results.
Pros
- Fast and highly reliable
- Variegation stays true
Cons
- Needs a mature plant
- Limited divisions
Propagating Snake Plant in Water
Although this snake plant propagation method does work, similar to pothos propagation, it isn’t always foolproof. Cuttings can rot if water isn’t changed regularly, and moving water-grown roots into soil can take time. That said, with patience and proper care, snake plant water propagation can still produce healthy new plants.
Taking Healthy Leaf Cuttings
➦ Begin by choosing one or two fully grown, healthy snake plant leaves that look strong and show no signs of damage, pests, or disease. Using sharp, clean scissors or pruning shears, cut the leaves cleanly at the base.
➦ Use only healthy cuttings to increase the success rate. Avoid leaves that are soft, damaged, or discolored.
Preparing and Dividing Leaf Cuttings
➦ Next, cut each leaf into 3–4-inch sections. You may also propagate using a full leaf, but smaller sections are easier to manage and root faster.
➦ While dividing leaf cuttings, keep track of which end is the top and which is the bottom. Snake plant roots form only from the bottom, so placing cuttings upside down prevents rooting and slows propagation.
Notching the Bottom of Cuttings
➦ To encourage faster rooting, cut a small V- or triangle shape at the base of each leaf cutting. This exposes more surface area, making it easier for roots to form. It also keeps the cutting positioned well in water.
➦ After notching, set the cuttings aside for a few days to let the ends dry. Allow them to callus, which lowers the chance of rot. Root rot is one of the most common issues during snake plant water propagation.
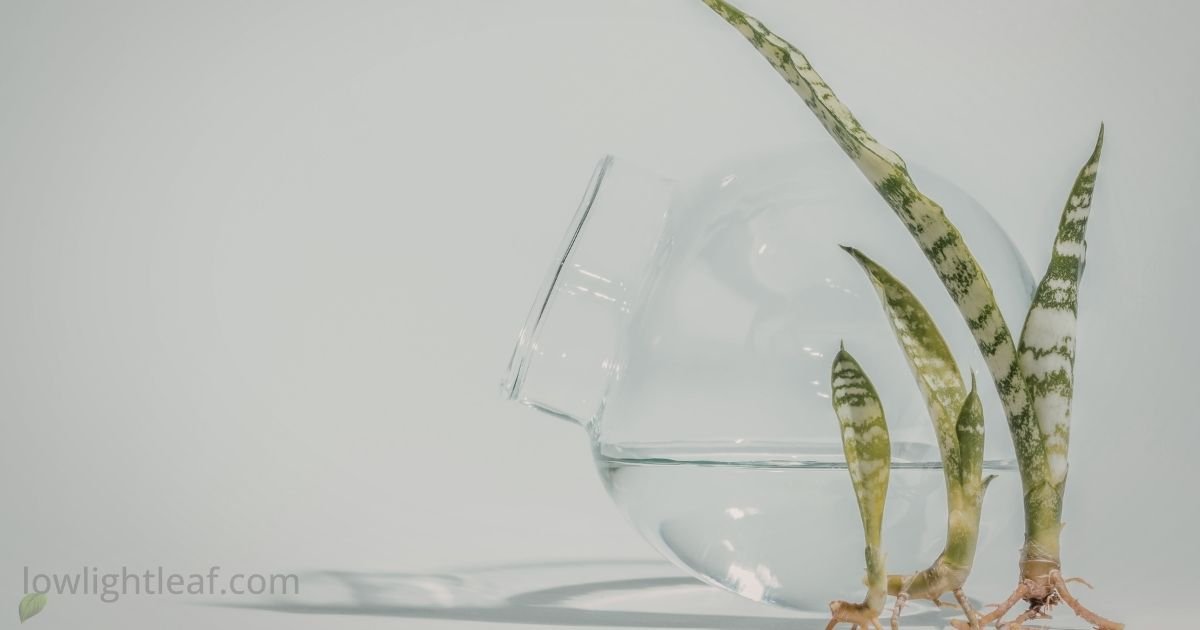
Rooting Snake Plant Cuttings in Water
➦ Now it’s time to let nature do its thing. Fill a clean glass jar with room-temperature water. Gently place the snake plant cuttings inside, making sure only the bottom ends are submerged in water while the rest of the leaves stay dry.
➦ Next, move the jar to a spot that gets medium to bright indirect light. Avoid direct sunlight, as too much heat can slow rooting or stress the cuttings. To keep conditions fresh and healthy, change the water every 7–14 days.
➦ With a little patience, you’ll start seeing roots forming within a few weeks. In some cases, tiny snake plant pups may also appear; an exciting sign that your snake plant propagation in water is working successfully.
Transferring Water-Rooted Cuttings to Soil
➦ When new roots reach about an inch in length, move the cuttings into soil. You can wait until small pups appear. Do not leave them in water too long. Water-grown roots can be slow to adapt to soil.
➦ Prepare a small pot with a drainage hole and a sandy, well-draining mix. Plant the rooted cuttings by gently burying the roots and pressing the soil around them.
After transplanting:
- Water lightly
- Place in bright, indirect light
- Avoid overwatering during the first few weeks.
With proper care, water propagation can yield healthy snake plants. Growth may be a bit slower than with division.
Pros
- Easy DIY method
- Visible root growth
Cons
- Variegation may not return.
- Slow propagation
Propagating Snake Plant in Soil
Once you’ve divided a mature snake plant, planting the cuttings straight into soil is often the safest option. It does take a bit longer to see results, but this method allows roots to form in their natural environment, leading to sturdier growth and healthier plants in the long run.
Prepare Healthy Leaf Cuttings
➦ Begin by selecting healthy, mature snake plant leaves with no signs of damage. Using clean, sharp pruning shears or scissors, cut the leaves at the base.
➦ Next, divide each leaf into 3–4-inch sections. When cutting, clearly mark or remember which end is the bottom, as only the lower end will root. Planting a section upside down will prevent it from growing roots, as explained in this Iowa State University guide on leaf section propagation.
➦ To further encourage rooting, make a small V-shaped notch at the bottom of each cutting. Allow the cuttings to dry and callus for 2–3 days before planting. This step helps prevent rot.
Plant the Cuttings in Soil
➦ Once the cut ends have dried, grab a small pot with drainage holes and fill it with a light, gritty mix, something like cactus or succulent soil works perfectly. Place each cutting into the soil with the notched end facing downward, pushing it in just deep enough to keep it stable.
➦ Gently press the soil around the base so the cutting stands upright, but don’t pack it too tightly. Set the pot in a bright spot with indirect light, and keep it out of direct, harsh sunlight while the roots begin to form.
Provide Proper Moisture and Root Care

➦ During the early rooting stage, keep the soil slightly moist but never soggy. Overwatering is the most common reason snake plant soil propagation fails.
➦ Check for root development every one to two weeks by gently tugging on the cutting. Once you feel resistance, roots have formed. Reduce watering and allow the soil to dry between waterings.
➦ With continued care and patience, you will eventually notice new snake plant pups emerging at the base, confirming successful propagation.
Pros
- Strong root development
- Better soil adaptation
Cons
- Slow rooting
- Variegation may fade
Snake Plant Propagation From Seeds
(Slow & Rare Method)
Propagating a snake plant from seeds isn’t very common, but it does work if you’re patient. This method takes much longer than division or cutting. Still, it’s a nice option if you enjoy growing plants from scratch. Just don’t expect fast results; snake plant seed propagation is a slow process. Because of this, patience and consistent care matter more than speed.
Sowing Snake Plant Seeds
➦ Fill a small pot or seed tray with a loose, well-draining cactus or succulent soil mix. Lightly moisten the soil so it feels evenly damp, not wet.
➦ Next, place the snake plant seeds on the surface and gently press them into the soil with your fingers. There’s no need to bury them deeply. To keep moisture and warmth locked in, cover the container with clear plastic or a small plastic bag.
Light and Warmth for Germination
➦ Set the container near a bright window where it receives indirect sunlight most of the day. Keep the area comfortably warm, and make sure the soil stays slightly moist, not wet. Check the soil every few days. If it looks dry, mist lightly to maintain humidity.
Caring for New Seedlings
➦ When the seeds sprout, remove the plastic cover. Place the seedlings in a bright area, but out of direct sunlight. Allow them to grow until they form a few real leaves.
➦ At this stage, feed them lightly with a diluted fertilizer. When the seedlings grow about 4 inches tall, transfer them to individual pots filled with well-draining soil. Water thoroughly after transplanting.
Quick Reality Check
Seed propagation does work, but it’s the slowest method by far. Most growers prefer division or soil propagation for quicker, more predictable results. However, if you enjoy long-term plant projects, growing snake plants from seed can still be rewarding.
Common Snake Plant Propagation Mistakes to Avoid
Even though snake plants are tough, small mistakes during propagation can slow growth or cause failure, just like with other common houseplants covered in our peace lily care guide.
Using Unhealthy or Weak Leaves: Always choose firm, mature leaves. Soft, damaged, or diseased leaves rarely root well and often rot before new growth appears.
Planting Cuttings Upside Down: This is one of the most common mistakes. Snake plant cuttings only root from the bottom. If planted the wrong way, they won’t grow at all.
Skipping the Callusing Step: Planting fresh cuttings straight into water or soil increases the risk of rot. Letting cut ends dry for 1–3 days helps protect them from infection.
Overwatering Cuttings: This is where most people go wrong,and following a proper snake plant watering guide helps prevent rot during propagation. Snake plant cuttings don’t need much water at all. When the soil stays wet, or water isn’t changed often, the cutting usually softens and rots rather than forming roots.
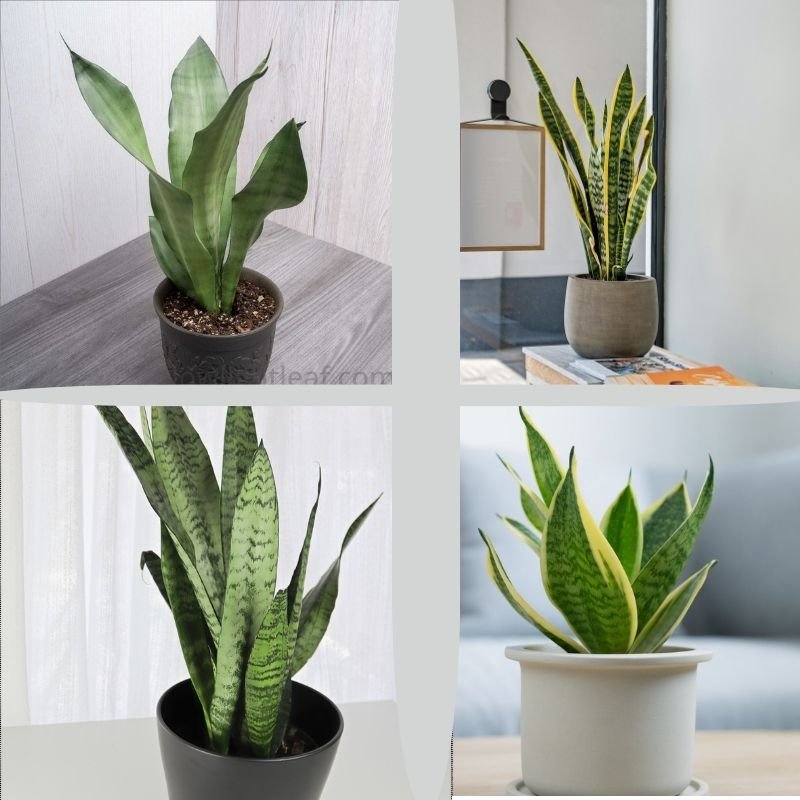
Losing Variegation with Leaf Cuttings: Many growers don’t expect this: Propagating variegated snake plants from leaf cuttings usually results in green, non-variegated growth because leaf cuttings don’t preserve the original variegation. If you want to keep the leaf pattern, divide the plant instead, as this method maintains the existing variegation.
Using Poorly Draining Soil: Heavy or compact soil traps moisture. Always use a loose, well-draining mix to support healthy root development.
FAQs for Snake Plant Propagation
Can you grow a snake plant from a cutting?
Yes. A healthy snake plant leaf cutting can grow roots and produce new pups in soil or water. However, this method is slow, and variegated varieties usually lose their original pattern.
Is it better to propagate snake plants in water or soil?
Soil propagation is more reliable in the long term because roots naturally adjust. Water propagation works too, but can make transplanting harder later.
How long does it take for a snake plant to propagate?
Roots usually form in 3–6 weeks, while new pups can take 2–3 months or longer, depending on care and conditions.
Can you replant a broken snake plant leaf?
Yes. Let the broken end dry for a few days, then plant it in well-draining soil or place it in water to root.